Monday, January 7, 2013

Gluten Free Mac And Cheese

Every Sunday after Church we all have lunch together.  Everyone is always so great about making sure things are gluten free so i can enjoy the lunch!  This Sunday we had Pork Chops, Veggies, and I made the gluten free mac and cheese.  This Mac and cheese is a favorite around this house.  Its just like your regular home made mac and cheese.
This is out of Elisabeth Hasselbeck's cook book "Deliciously G-Free".  I haven't found one thing in this book that i didn't like.
Here's what you will need

  • 1 pound gluten-free macaroni; shells, penne, or elbows.  
  • 3 cups of 2%milk
  • 1 teaspoon of potato starch
  • 1/2 teaspoon of salt
  • 2 tablespoons salted butter
  • 2 tablespoons cream cheese
  • 1/2 teaspoons paprika
  • 1/2 teaspoon garlic powder
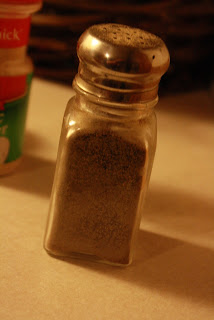
  • 1/4 teaspoon freshly ground black pepper (Optional)
  • 3 cups grated mild cheddar or American cheese, or a mixture


*Bring a large pot of salted water to a boil.  Add Pasta and cook for 3 minute less than the package instructions indicate. 

This is the BEST Gluten free pasta brand I have tried yet!


*Meanwhile, make the sauce: Combine the milk, potato starch, and salt in a medium bowl and whisk to combine.

*Place the butter and cream cheese in a large stockpot and heat over medium heat.


 When the cream cheese is soft and the butter is melted, slowly whisk in the milk mixture.  Cook, stirring occasionally, until the mixture is hot and has thickened slightly, 3 to 4 minutes.  Add the paprika, garlic powder, and black pepper if using.


Reduce the heat to low and add the cheese.

Cook, stirring frequently, until thickened, about 3 minutes.

*Drain the pasta, add it to the sauce, and cook for 1 minute, stirring to coat the pasta with sauce.  
Divide in individual serving dishes and place in a 400 degrees oven for 10 minutes until the tops are browned.

I put mine in this casserole dish since it was for a group of people.
I put the left over cheese om top to give it a nice crust. 

It may take a little longer to brown if you put it in a big dish.  Just check on it and adjust as needed.
Enjoy!
This was a big hit at church!  Even the people who are picky on what they eat loved it!
I like to think things are a hit when nothings left... and my dish was cleaned out when lunch was over!!!  

Friday, January 4, 2013

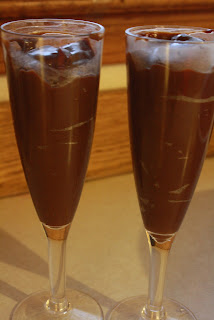
Microwave Chocolate Pudding

This is another great one from "The Gluten Free Bible.  The all-in-all guide to enjoying fabulous food with out gluten)
I always double this because I have a big family.  but you can be the judge of how much you want to make.
Here is what you will need.


  •  1/4 cup of unsweetened cocoa powder 
  • 2 tablespoons cornstarch 
  • 1 1/2 cups of soy milk, almond milk, or other dairy-free milk (I didn't make min dairy free so i just used milk)
  • 1/3 cup sugar
  • 1 teaspoon vanilla
  • 1/8 teaspoon ground cinnamon
  • assorted sprinkles


First you are going to combine cocoa powder and cornstarch in a medium microwavable bowl or 1-quart glass measure. 


Now whisk in soy milk until well blended.


Microwave on HIGH 2 minutes; stir.  Microwave on MEDIUM-HIGH (70%) 2 1/2 to 4 1/2 minutes or until thickened, stirring every 1 1/2 minutes.  (if you are doubling this you may need to add on more time)


Stir in Sugar, vanilla and cinnamon.


Let stand at least 5 minutes before serving.  Stirring occasionally to prevent skin from forming.
spoon into serving dishes.


To serve cold, press plastic wrap into surface of pudding to prevent skin from forming and refrigerate at least 1 hour.  Garnish with sprinkles just before serving.


this makes 2 to 4 servings 

This is so easy!  I hope you enjoy.  My family loves this because it only takes a few minutes and of course it chocolate!


Tuesday, January 1, 2013

Mini Swirl Cheesecakes

For Christmas I got this great cook book called " The Gluten-Free Bible.  The all-in-all guide to enjoying fabulous foods without gluten."
As I was reading through this cook book some well missed baked good caught my eye!
This mini swirl cheesecake looked so simple i just had to try it!

This is what you will need to make your own mini Cheesecakes

  • 8 Squares (1 ounce each) Semisweet baking chocolate
  • 3 Packages (8 ounces each) cream cheese, softened
  • 1/2 cup sugar
  • 3 eggs
  • 1 teaspoon vanilla 

I got these cute cup cake liners for only 99 cents!  
I used these in the cupcake baking dish to make an easy clean up.

First preheat your oven to 325. and go ahead and put your cupcake liners in your cupcake baking dish.
Go ahead and take out your cream cheese so it can become soft.


I used Baker's semi-sweet baking chocolate.  
Use all the squares inside.   


Put in a microwavable bowl. Microwave on high for 1 1/2 minutes or until melted, 
stirring after 1 minute.  let cool slightly. 


Now once your cream cheese is soft beat in the cream cheese and sugar with electric mixer at medium speed about 2 minutes or until light and fluffy.


Add eggs and vanilla; beat about 2 minutes or until well blended.
place 2 heaping tablespoons of mixture into each cup cake cup.

Beat melted chocolate into remaining cream cheese mixture until well blended.  Spoon chocolate mixture on top of plain mixture in cup cake cups. swirl with a knife.

Place cup cake pan in a larger baking pan; place on oven rack.  pour warm water into larger pan to depth of 1/2 to 1 inch.  Bake cheesecakes 30 minutes or until edges are dry and centers are almost set.  Remove cup cake pan from water. cool cheesecakes completely in muffin pan on wire rack
makes 12 cheesecakes


They should look something like this!


Once they are cool all the way remove the cup cake liners and enjoy!


These were a huge hit in my house!  My sister even said that it was the best cheesecake ever!  
These are very easy to make.  I hope you love them just as much as I do!


A Little Bit About My Story

This is a little look into my story about how I became gluten free.

Since I can remember I had a hard time eating out.  Whenever I would go out to eat, more than likely I would end up with cramps and feeling sick. It started to get worse when I was in high school. I never wanted to go out to eat because I knew right after I would feel sick.  It really got in the way of me being able to enjoy a lot of the things my friends enjoyed.  I thought maybe I couldn't handle spicy foods, so I cut that out....didn't help. I tried taking different things to maybe stop the sick feeling before eating... didn't help.
It became something I learned to live with.

Around December of 2011 it got worse.  I couldn't even finish my meal without getting sick.  It was no longer a "maybe I will get sick." I knew I was going to get sick whenever it came to be meal time.  I would hate meal time so much.  

Around that time I started to help my NaNa take care of her mother, who wasn't doing well.  I would go and sit with her, and help her eat lunch.  So I began to think maybe I was under emotional stress and that was why I was so sick.  I put it in the back of my thoughts and again learned to live with it.

 This is where my story really starts. On Christmas Eve my family always goes to get donuts.  I, of course, had one (little did I know it would be my last). Of course it was a very busy day being Christmas Eve, so I just warmed up some pasta from a few nights before. At this time I wasn't feeling too great, but again lived with it and left for the family get together.   My family always gets together on Christmas Eve to eat dinner together and exchange gifts.  The food is always very good with a lot of  holiday favorites including lots of delicious cakes and pastries, which is what I always made sure I saved room for.  Once again I couldn't even make it through the meal.  Not thinking anything of it, I went right for the cakes, trying a little bit of everything.  Once we got home I felt more sick than I ever have before.  I was up till 3:30 a.m. The cramps were so bad that night that I couldn't move.  I thought I was going to need to wake up my parents to take me to the hospital on Christmas.  I thought it could wait till morning and was finally able to get a little sleep.

We started doing some research on what was going on.  Joint pains, being tired, getting sick every time I would eat, and cramps were the symptoms that was making eating such a hard thing for me to do.We found all this info on gluten and all the symptoms that come with the allergy. Ding ding ding!

It was hard at first giving up so much, but now a year into it I have never felt better.  I hope this blog can help you if you're like me jumping into this lifestyle for health reasons or because you just want to be healthier.
Either way I hope you enjoy and we can all learn together.  I will share with you what I'm cooking and how you can make your old favorites into a great gluten free version. 

Enjoy!
Stephanie